
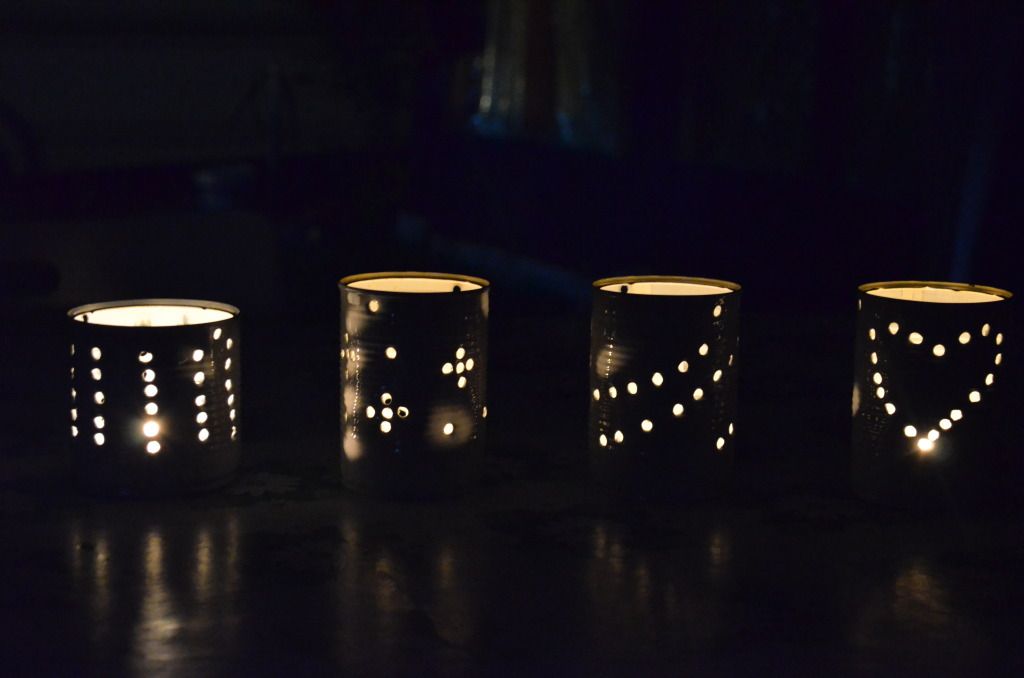
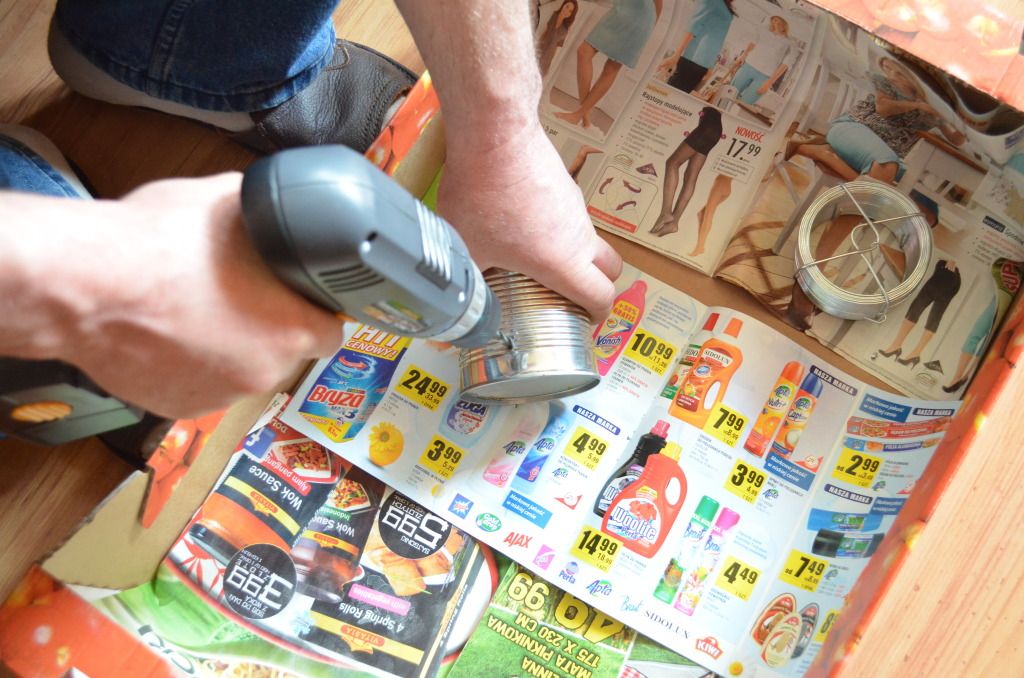
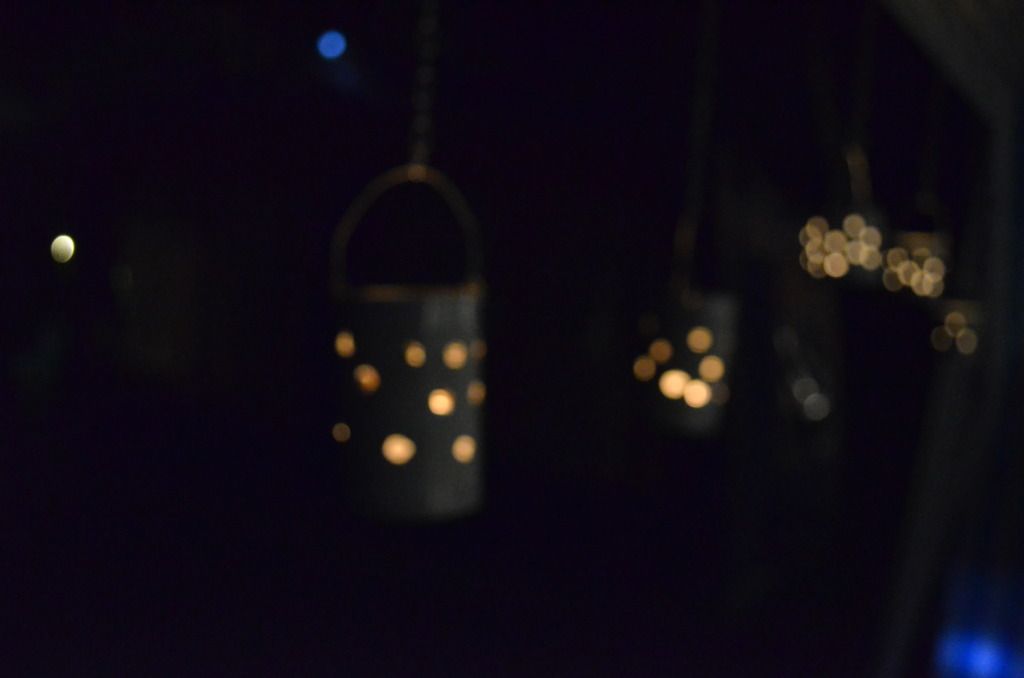
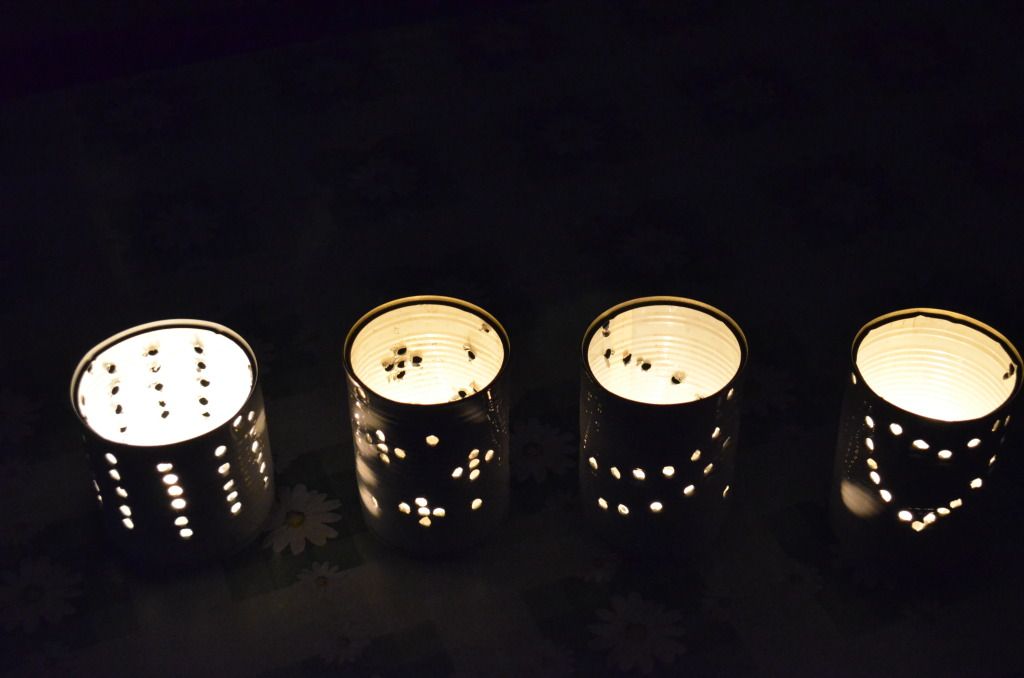
You don't even know for how long I've been collecting the tins and keeping them in my cabinet. My family considered this as collecting rubbish, but then they realised that, in fact, it was a pretty clever idea. Ha ha! So I made these with a big help of my dad (you know, the drilling part- I was a bit terrified of the drill, doing something to my hand, but at the end, I managed and I did some holes myself. I'm so proud of myself right now ;) ) All I can say about this project is that it's just so fun and beautiful. They are so charming because the light is gentle and creates different patterns. You should really collect tins. Totally. OK. So without further ado... Tin lanterns DIY!
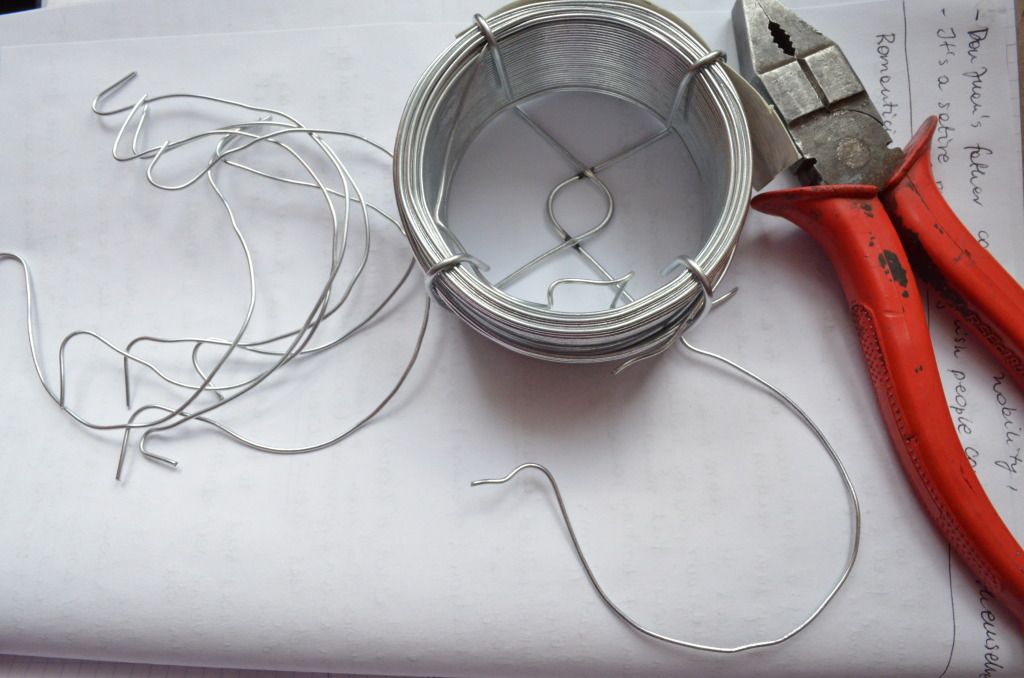
Potrzebne będą: puszki, farba w spray'u, młotek i gwoźdź lub wiertarka, drut (ja użyłam metalowego drutu o grubości 1,3 mm), podgrzewacze.
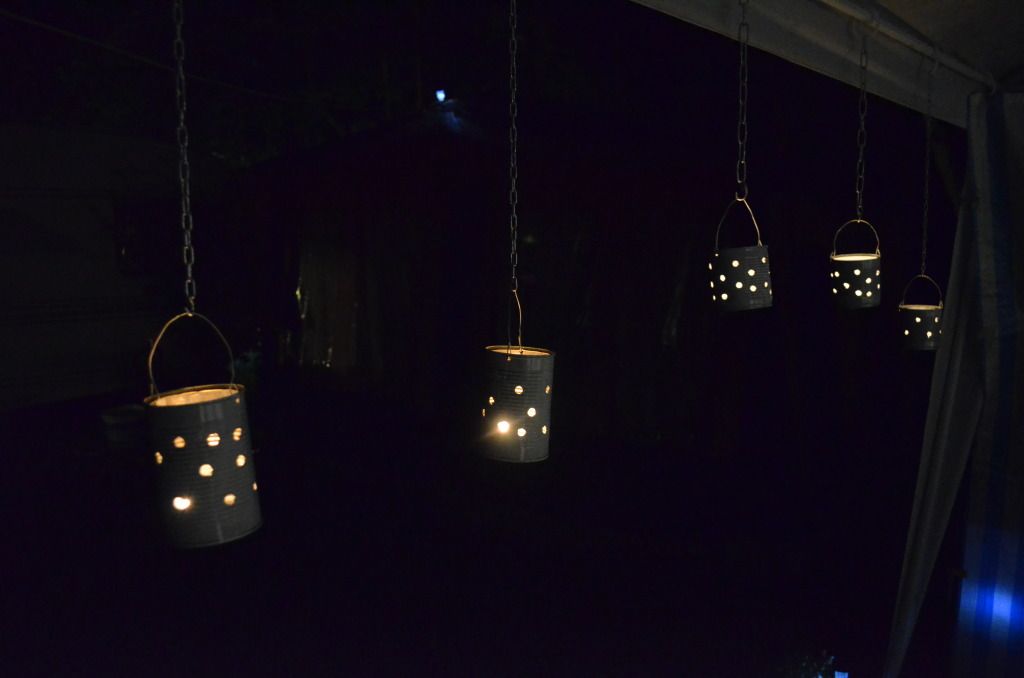
You will need: tins, a spray paint, a hammer and a nail or a drill, a wire (I used 1.3 mm thick galvanised steel wire), tealights.
1. Zerwać etykiety z puszek i namoczyć w ciepłej wodzie, aby pozbyć się resztek kleju.
2. Za pomocą markera, malować kropki na puszce, aby stworzyć pożądany wzór. Ja ominęłam ten krok, ponieważ wzór moich puszek był raczej prosty.
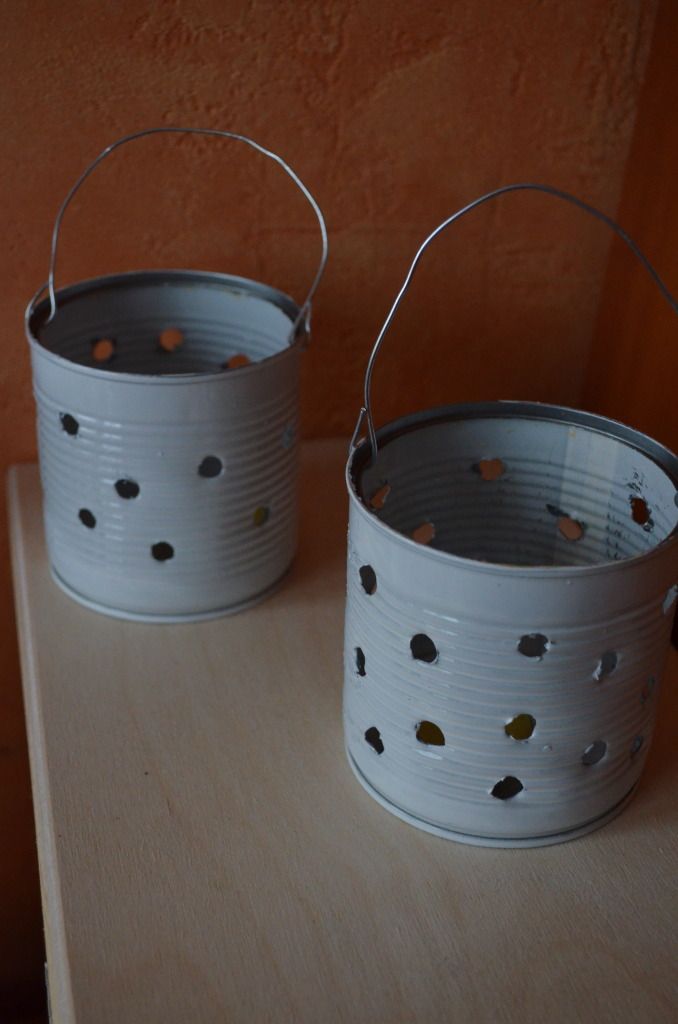
3. Za pomocą gwoździa i młotka lub wiertarki wywiercić otwory w puszkach, a jeśli chcemy je potem zawiesić również wywiercić 2 otwory po przeciwnych stronach puszki przy jej brzegu.
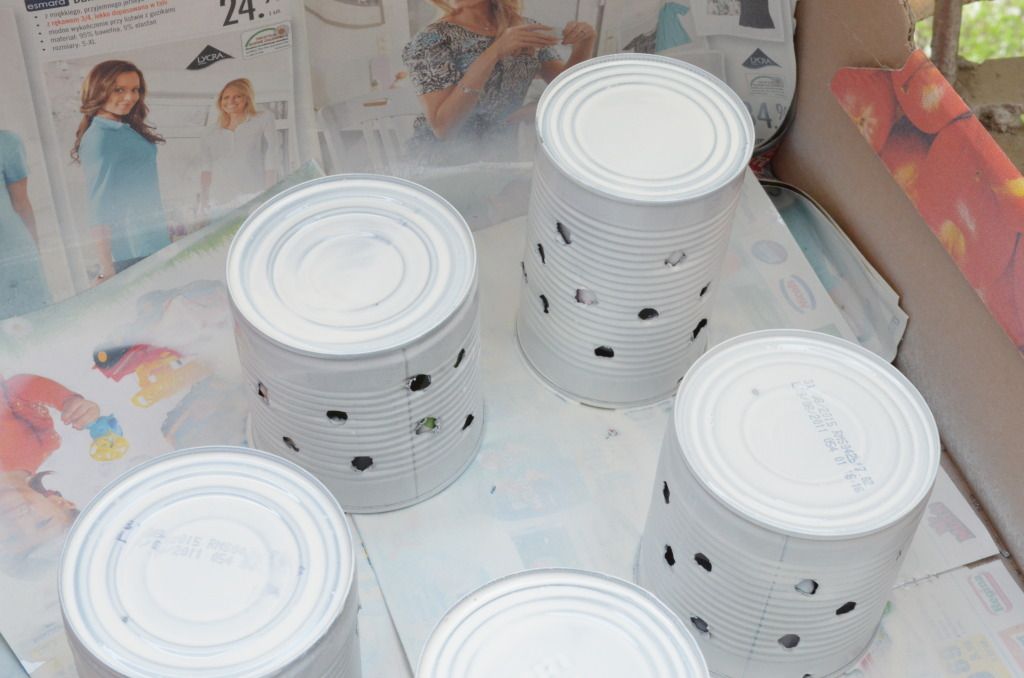
4.Potem, pomalować puszki farba i pozwolić im wyschnąć lub zostawić je takie jakie są. (Ja wybrałam białą farbę, bo ona pasuje prawie do wszystkiego).
5. Aby lampiony wisiały należy uciąć kawałek drutu o odpowiedniej długości i przewlec go przez otwory w puszce, a następnie dogiąć końce.
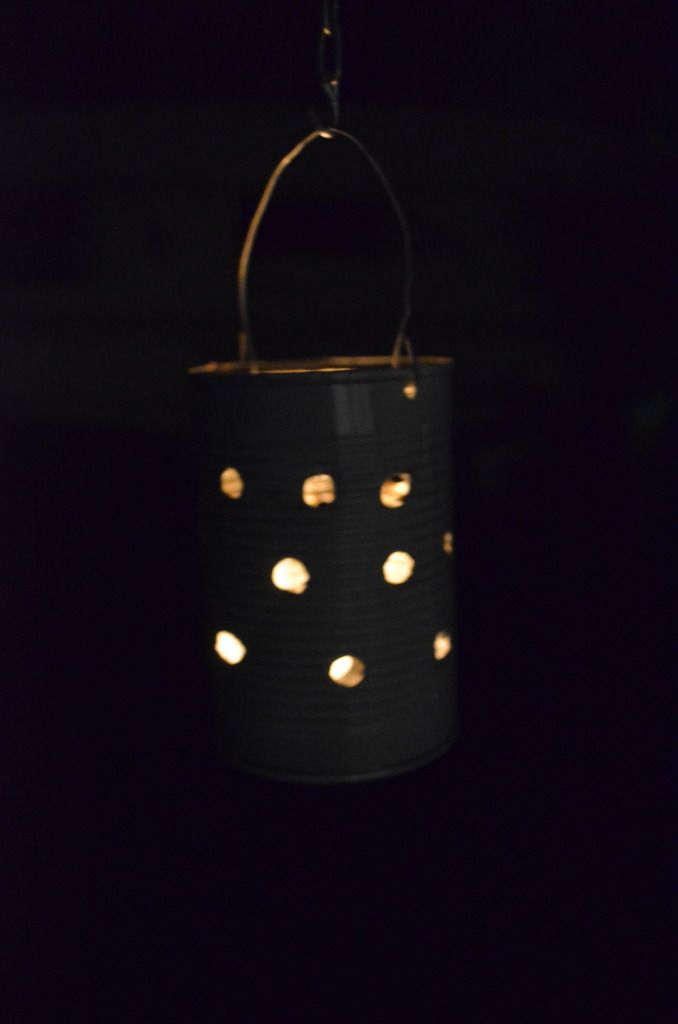
6. Umieścić podgrzewacze w lampionach, zawiesić je i rozkoszować się czującym efektem!

1. Remove any labels or glue residue from the tins by soaking them in warm water.
2. Use the marker to make a design on the tins. Do this by making dots in the shape you desire. My design was simple so I omitted this step.
3. With the hammer and nail or with the drill, begin punching holes where you drew your dots. If you will be making a hanging lantern, punch two holes on opposite sides of the tin below the rim.
4. Then, paint the tins in the colour of your choice ( I picked white spray paint that goes almost with every material). Let them dry. OR you can leave them as they are if you prefere them so.
5. For a hanging lantern, take a piece of wire and insert an end through each of the two holes on the top of the can. Twist the ends so they are secure in the tin.
6. Place a tealight inside the tin, hang it up and enjoy a charming effect.

Agnieszka
Świetny pomysł :) U mnie niestety niewykonalny ze względu na kota, który nie odpuści niczemu co zwisa ;)
ReplyDeleteA dziękuję :) Chociaż, z drugiej strony, kot miałby zabawę :P
ReplyDelete