Happy Monday!
Agnieszka

Monday 30 April 2012
Sunday 29 April 2012
Kwietniowy przegląd/ April in review


Popularne posty/ Popular posts:
Staromodne ciasto czekoladowe/ Old-fashioned chocolate cake, Amerykańske hamburgery/ American hamburgers, Guzikowy abażur/ Button lampshade DIY, Norweskie bułki cynamonowe/ Norwegian cinnamon buns, Hummus, Marchewkowe muffiny nadziewane serkiem/ Cream-filled carrot muffins, Pieczone kieszonki z serem brie/ Bite-sized baked brie pockets, Muffiny z herbatą Earl Grey/ Earl Grey tea muffins
xoxo,
Agnieszka
Thursday 26 April 2012
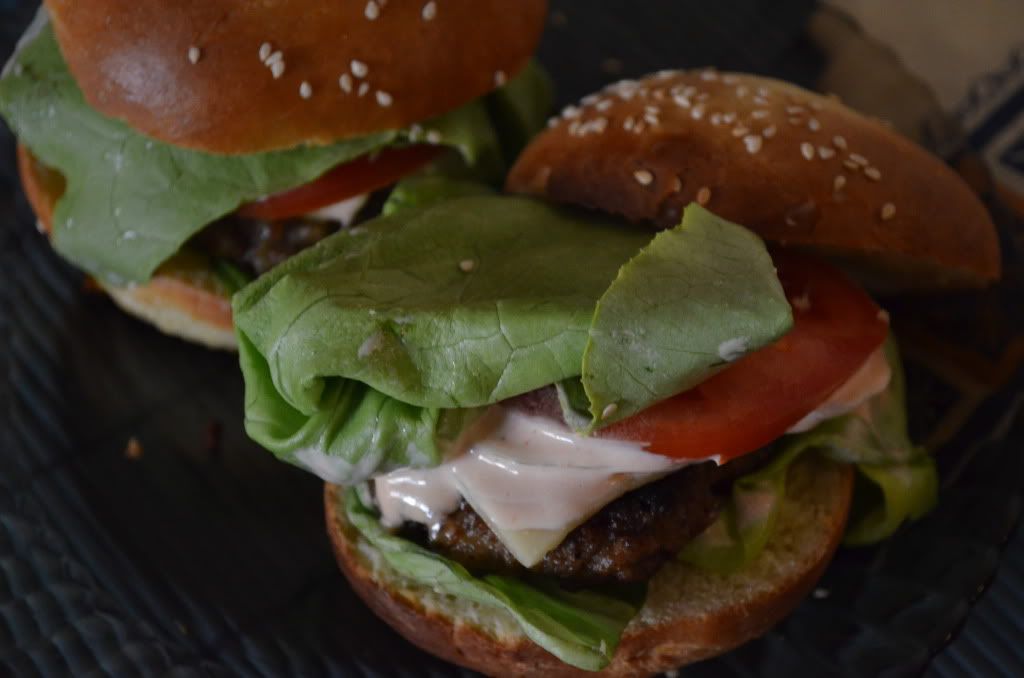
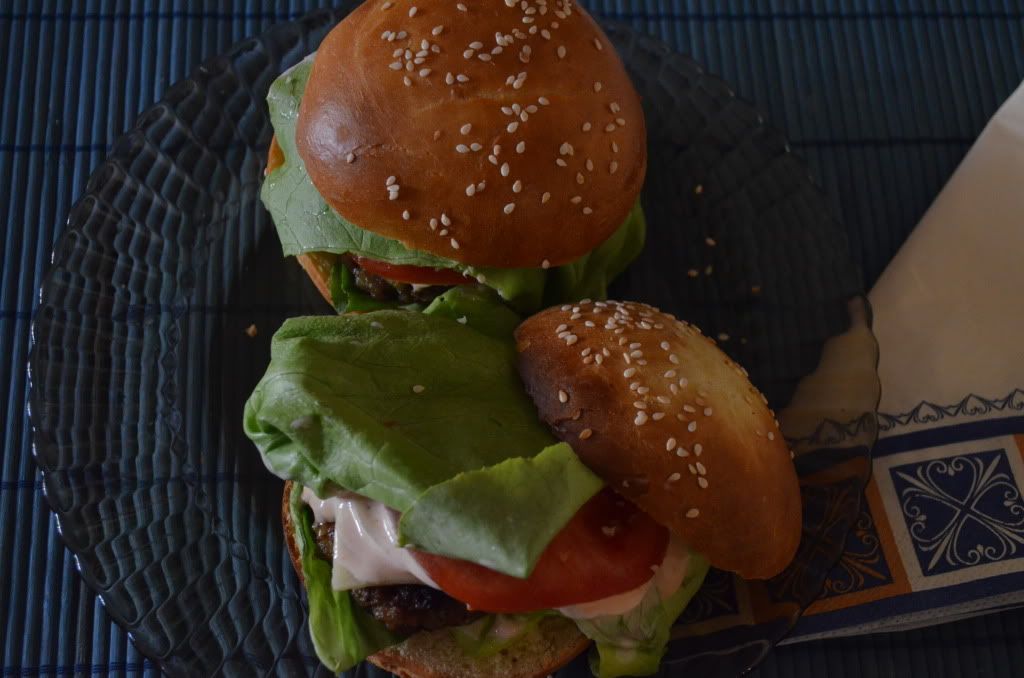
Amerykańskie hamburgery/ American hamburgers
Mój wczorajszy obiad. Oczywiście bułki musiałam upiec sama, ale przepis zamieszczę w najbliższej przyszłości. Przepis na resztę znajdziecie w tym poście. Zapraszam!
My yesterday's dinner. Of course I made the buns myself, but I will post the recipe some time soon. Here's the recipe for the rest. Enjoy!
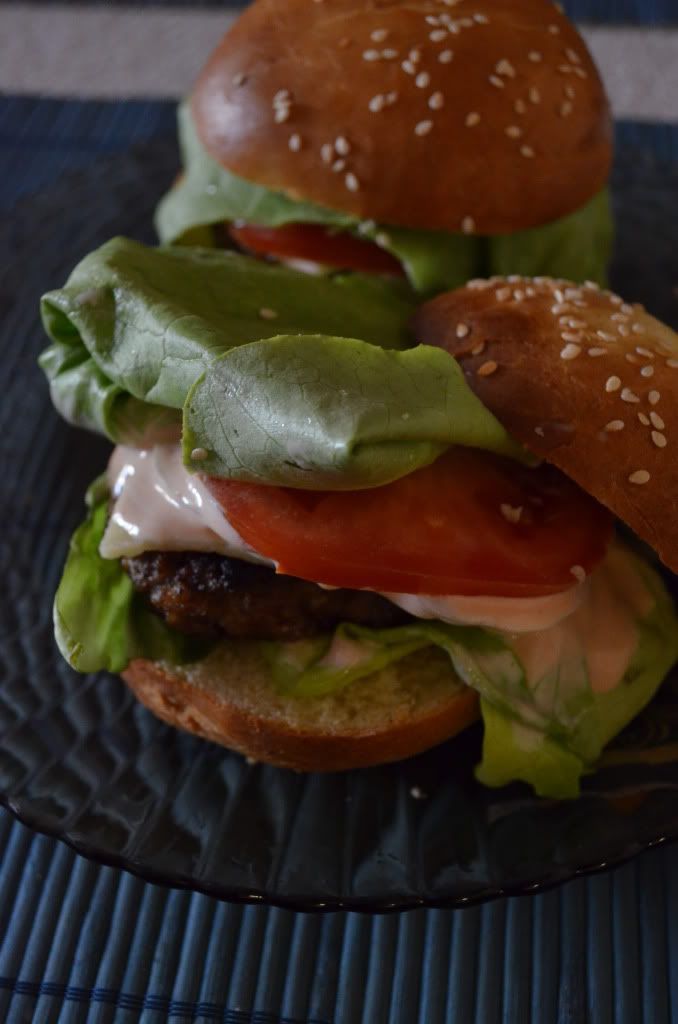
Przepis pochodzi ze strony Jamie'ego Olivera, ale nieco go zmieniłam.
The recipe comes from Jamie Oliver's site but I adapted it slightly.
Burger:
- oliwa z oliwek
- 1 średnia cebula
- 4 kromki chleba bez skórek
- 500g zmielonej wieprzowiny dobrej jakości
- 1 łyżeczka soli morskiej
- 1 łyżeczka świeżo mielonego czarnego pieprzu
- 1 duże jajko
- 4 łyżeczki majonezu
- 1 łyżeczka ketchupu
- szczypta pieprzu cayenne
- sok z połowy cytryny
- 12 pasków wędzonego bekonu dobrej jakości
- 6 dużych bułek do hamburgerów
- 1 umyta i wysuszona sałata
- 4 pokrojone pomidory
- 6 pokrojonych korniszonów
- kilka marynowanych papryczek chili
- kilka plasterków sera żółtego
Rozgrzej patelnię, wlej odrobinę oleju i wrzuć posiekaną cebulę. Smaż 10 min lun aż cebula zmięknie, potem odstaw ją na bok do ostygnięcia.W blenderze zmiksuj chleb. Dodaj cebulę do mięsa, chleb i inne składniki. Dobrze wymieszaj ręką i uformuj 6 kulek. Namocz ręce w wodzie, aby mięso się nie kleiło. Spłaszcz je tak, aby miały ok. 2 cm grubości i żeby wyglądały jak burgery :P. Przełóż mięso na natłuszczona tacę i przykryj folia spożywczą. Włóż je do lodówki na przynajmniej godzinę lub do momentu, gdy mięso będzie zwarte. Przygotuj sos majonezowy: wszystkie składniki do małego naczynia i mieszamy.
Rozgrzej patelnie, możesz użyć jakiegoś tłuszczu-ja używałam patelni grillowej i oliwy z oliwek. Nakładaj mięso i smaż ok. 3-4 minut z każdej strony lub do momentu, który Cię zadowala.Gdy mięso jest gotowe, przekrój bułki i i nałóż dodatki, sos i mięso do środka.
For the burger mix:
- olive oil
- 1 medium onion
- 4 slices of bread, crusts removed
- 500g good-quality minced pork
- 1 teaspoon sea salt
- 1 heaped teaspoon freshly ground black pepper
- 1 large egg
• 4 teaspoons mayonnaise
• 1 teaspoon tomato ketchup
• a good pinch of smoked paprika or cayenne pepper
• juice of ½ a lemon
To serve: (optional)
- 12 rashers of smoked streaky bacon, the best quality you can afford
- 6 large or 18 small burger buns
- 1 soft round lettuce, leaves washed and spun dry
- 4 tomatoes, sliced
- 6 gherkins, sliced
- a few pickled chillies
- a few slices of cheese
Put a splash of olive oil into a large frying pan on a low heat and add your chopped onion. Fry for 10 minutes or until the onions have softened, then put to one side to cool completely. Blitz your bread in a food processor until you get a fine consistency. Oil a clean baking tray and put aside. Put the cooled onions into a large bowl with the rest of the burger ingredients. Use clean hands to scrunch the mixture together really well, then divide into 6 equal balls for burgers. Wet your hands and roll the balls into burger-shaped patties about 2cm thick. Place your burgers or sliders on the oiled baking tray and pat with a little olive oil. Cover them with cling film and put the tray into the fridge for at least an hour, or until the patties firm up Make your spicy mayo, so put all the ingredients into a bowl, mix well and put to one side.
If using a frying pan or griddle pan, put it on a high heat now and let it get really hot. However you decide to cook your burgers, they’ll want around 3 or 4 minutes per side – you may have to cook them in batches if your pan isn’t big enough. When the burgers are cooked to your liking and it’s all looking really good, halve your burger buns and warm them through.
When everything comes together pop your burgers or sliders on to their buns, add all your lovely toppings and your spicy mayo.
xoxo,
Agnieszka
Wednesday 25 April 2012
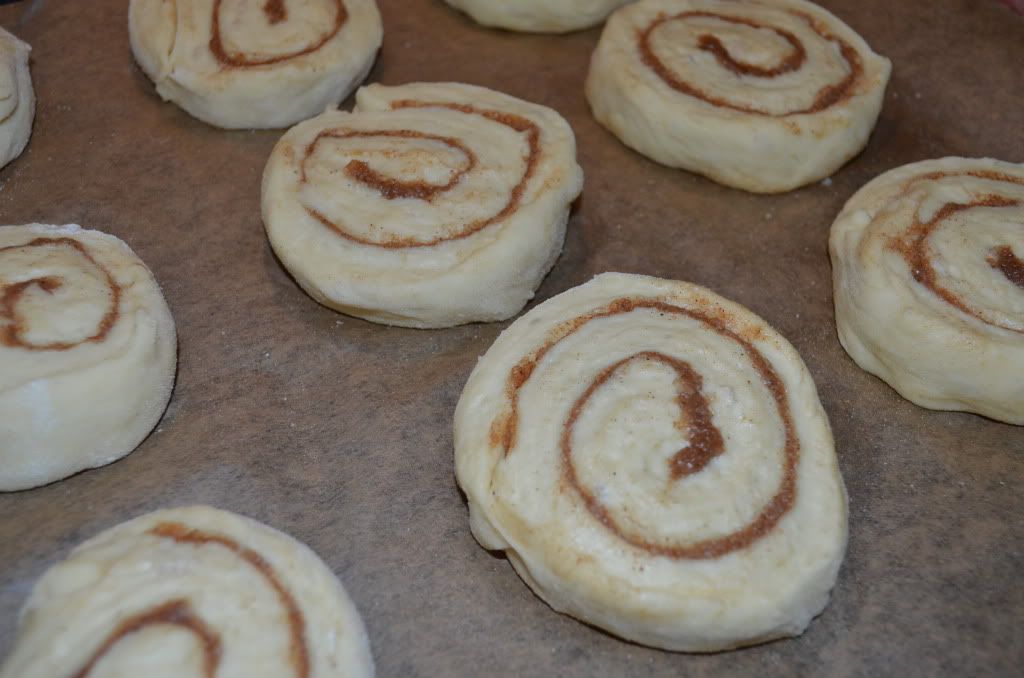
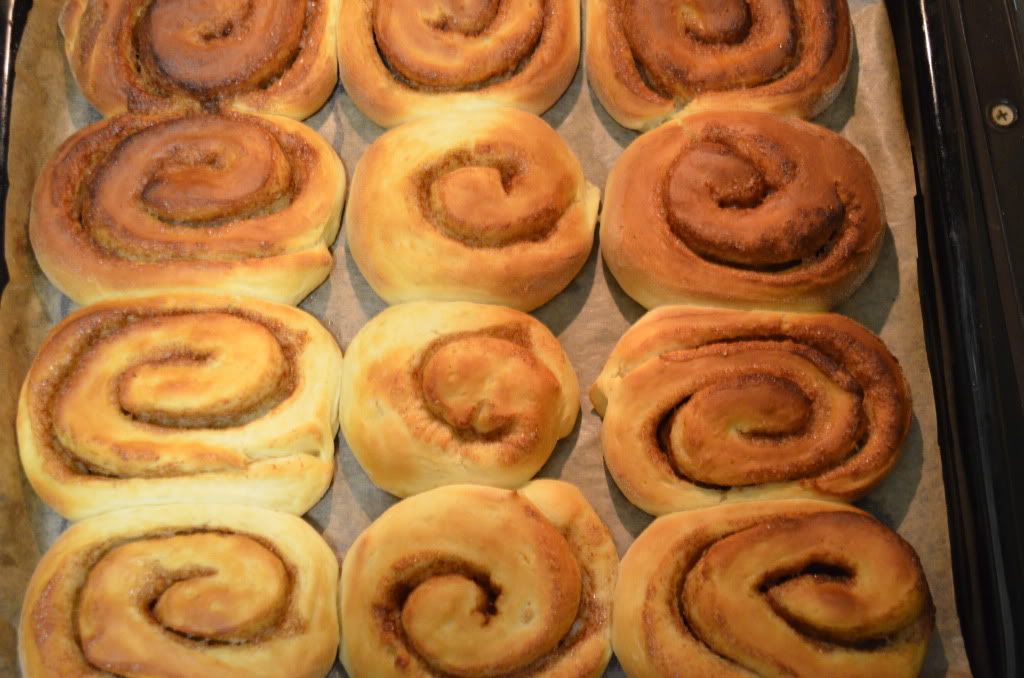
Norweskie bułki cynamonowe/ Norwegian cinnamon buns
Już dawno chciałam wypróbować ten przepis. Szukałam cynamonowych bułek podobnych do tych, które jadłam kiedyś na stoku w Czechach. Różnica jest taka, że tamte były raczej kruche, a te bułki są drożdżowe i bardzo wyrośnięte. Ale tak czy siak, stanowią pyszną przekąskę :)
I've wanted to try these buns for a long time. I've been looking for cinnamon buns like those which I tried In the Czech Republic during one of my winter trips on ski slopes. The only big difference is that those were more crispy and these are yeasty and more puffy. Either way, they make a great treat :)

Składniki na 20 bułeczek:
I've wanted to try these buns for a long time. I've been looking for cinnamon buns like those which I tried In the Czech Republic during one of my winter trips on ski slopes. The only big difference is that those were more crispy and these are yeasty and more puffy. Either way, they make a great treat :)
Składniki na 20 bułeczek:
- 600 g mąki pszennej
- 100 g cukru (dałam 70 g, wg mnie tyle wystarczy)
- pół łyżeczki soli
- 21 g suchych drożdży lub 42 g drożdży świeżych
- 100 g masła
- 400 ml mleka
- 2 jajka
Na nadzienie:
- 150 g bardzo miękkiego masła (lub rozpuszczonego- tylko 90 g)
- 150 g cukru (dałam 120 g)
- 1,5 łyżeczki cynamonu
W dużym naczyniu wymieszać mąkę, cukier, sól, drożdże. Masło rozpuścić, wymieszać z mlekiem i roztrzepanym jajkiem. Połączyć z mąką. Wymieszać dobrze i zagnieść (ręcznie lub mikserem). Ciasto powinno być gładkie i sprężyste. W razie potrzeby dodać trochę mąki.
LUB podczas używania świezych drożdży: drożdże rozpuścić w mleku z dodatkiem soli i cukru. Wsypać mąkę, a następnie wlać rozpuszczone masło i jajka. Zagnieść ciasto, aby było gładkie i sprężyste, a w razie potrzeby dodać mąki.
Przykryć i odstawić do wyrośnięcia na 25 minut. Po tym czasie ciasto rozwałkować na prostokąt o wymiarach 50 x 25 cm. W międzyczasie wszystkie składniki nadzienia wymieszać w naczyniu. Przygotowany prostokąt posmarować nadzieniem, następnie zwinąć wzdłuż dłuższego boku. Ostrym nożem pokroić na 2 cm kawałki. Ułożyć je częścią rozciętą na blaszce. Powinno wyjść około 20 kawałków. Nie martwić się, jeśli nie zetkną się ze sobą, zrobią to podczas rośnięcia i w piekarniku. Ważne, by były symetrycznie rozłożone. Pozostawić do napuszenia na 15 minut. Piec około 20 - 25 minut w temperaturze 230ºC, jeśli będą zbyt szybko się przypiekać można je przykryć od góry folia aluminiową. Podawać ciepłe, ale jak są chłodne też są jadalne :D
Ingredients: (for 20 buns)
- 600 g plain flour
- 100 g sugar (I used 70 g)
- 1/2 teaspoon salt
- 21 g active dry yeast or 42 g fresh yeast
- 100 g butter
- 400 ml milk
- 2 eggs
Filling:
- 150 g soft butter (or melted- only 90 g)
- 150 g sugar (I used 120 g)
- 1 1/2 teaspoon cinnamon
Mix flour, sugar, salt and active dry yeast in a big bowl. Melt the butter, mix with milk and eggs. Add flour and mix well. Knead the dough until smooth and flexible. If you need you can add more flour.
OR when using fresh yeast: add fresh yeast to the milk with salt and sugar. Mix. Add flour, eggs and melted butter. Knead the dough until smooth and flexible. If you need you can add more flour.
Cover the bowl with kitchen towel and put aside for 25 min until increases its volume. After that time, roll the dough into 50 x 25 cm rectangle. In the meantime, mix the ingredients for the filling. Place the filling on the rectangle and roll alongside with the longer side. Using a sharp knife, cut the dough into 2 cm pieces. Place them on the baking tray laid with parchment paper. You should have about 20 buns. Don't worry if they're not sticking to each other, they will after the baking. Remember to place them symmetrically on the tray. Leave them for 15 min to increase their volume. Bake for 20-25 min in the oven at 450 F. Place aluminium foil on top of them if they're getting the colour too fast. Serve warm, but they're are edibile as cold, too :D
xoxo,
Agnieszka Monday 23 April 2012
Sunday 22 April 2012
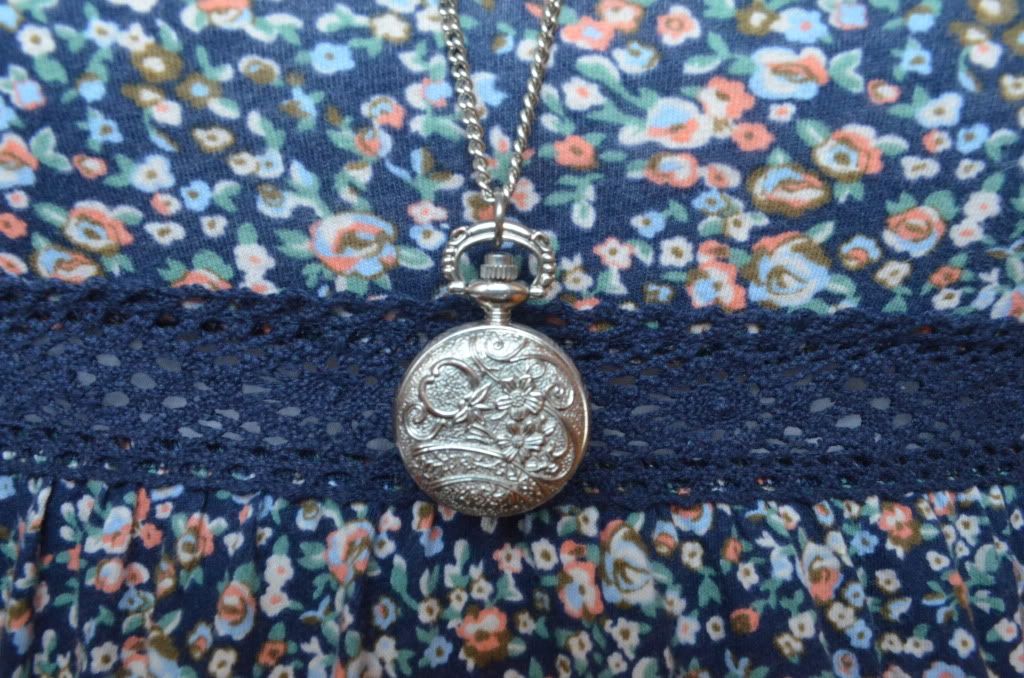
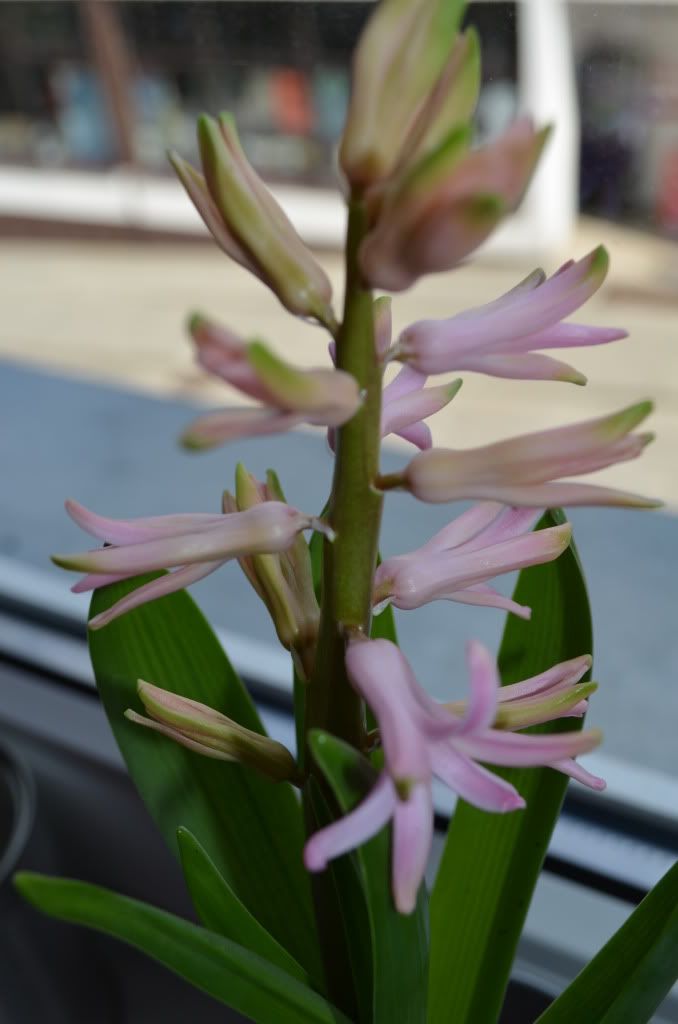
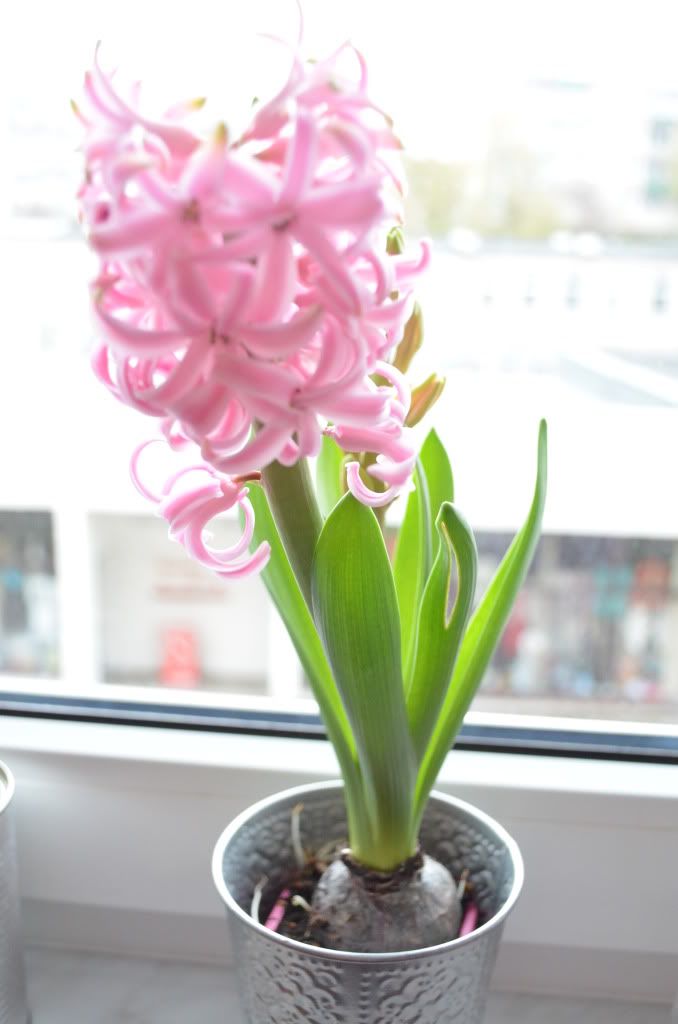
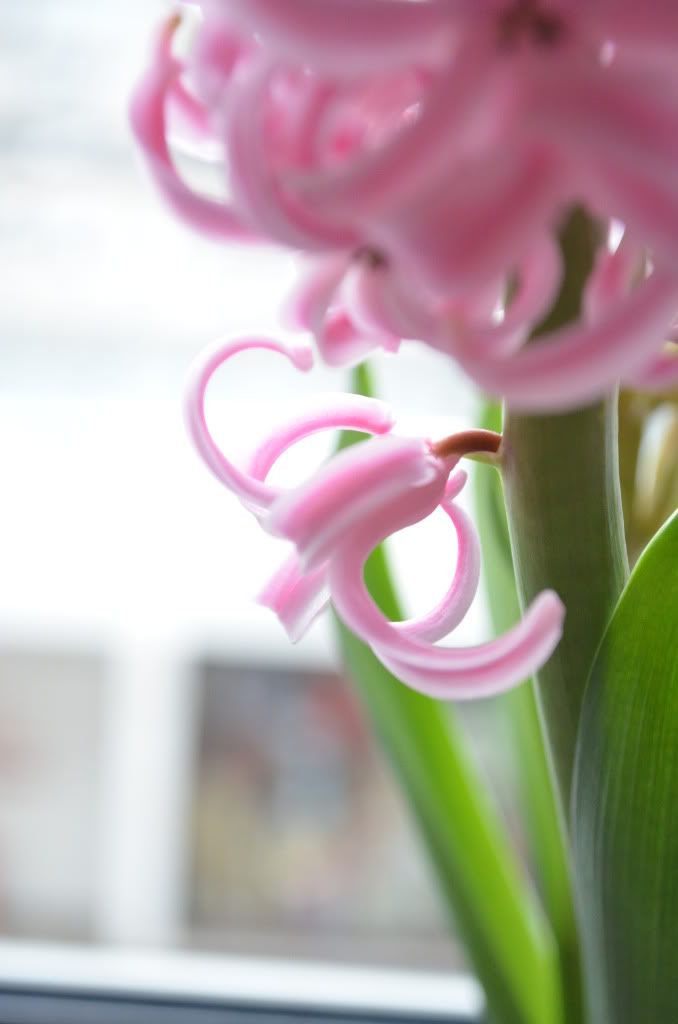
Kocie okulary i nowa grzywka i śliczne kwiaty/Cat-eye glasses and new fringe and cute flowers!
A więc tak, to są moje nowe wymarzone okulary. Może wyglądam dziwnie, ale to w końcu ja, prawda? W dziwności mi do twarzy :P Dodatkowo, aby moja wcześniejsza długa grzywka nie kolidowała z większymi okularami, Monika ścięła mi ją w kształcie delikatnej litery U ( coś jak miała Bettie Page, ale dużo, dużo delikatniej- bo na razie testuje ten kształt). No i w końcu ubrałam tą sukienkę, tym razem jako tunikę, ale też się liczy.
Wychodzi na to, że moja siostra nosi moje rzeczy częściej niż ja! xD

So here you have it, my dreamed eye glasses. Maybe I look weird in them, but in the end it's me, right? Being weird suits me :P In addition, in order to be able to wear this new big eye glasses I had to have my fringe cut. My sister cut it in the delicate U shape (something like Bettie Page had, but much much delicate- I'm still testing whether this shape is good for me). And finally, I wore this dress, as a tunic this time, but it still counts.
It turns out that my sister wears my clothes more often than I do! xD


xoxo,
Agnieszka
Wychodzi na to, że moja siostra nosi moje rzeczy częściej niż ja! xD
It turns out that my sister wears my clothes more often than I do! xD
Bluzka/Blouse- ?
Sukienka/Dress- H&M
Sweter/Jumper- sh
Spodnie/Trousers- F&F
Buty/Shoes- CCC
Naszyjnik-zegarek/Watch-necklace- Camaieu
xoxo,
Agnieszka
Thursday 19 April 2012
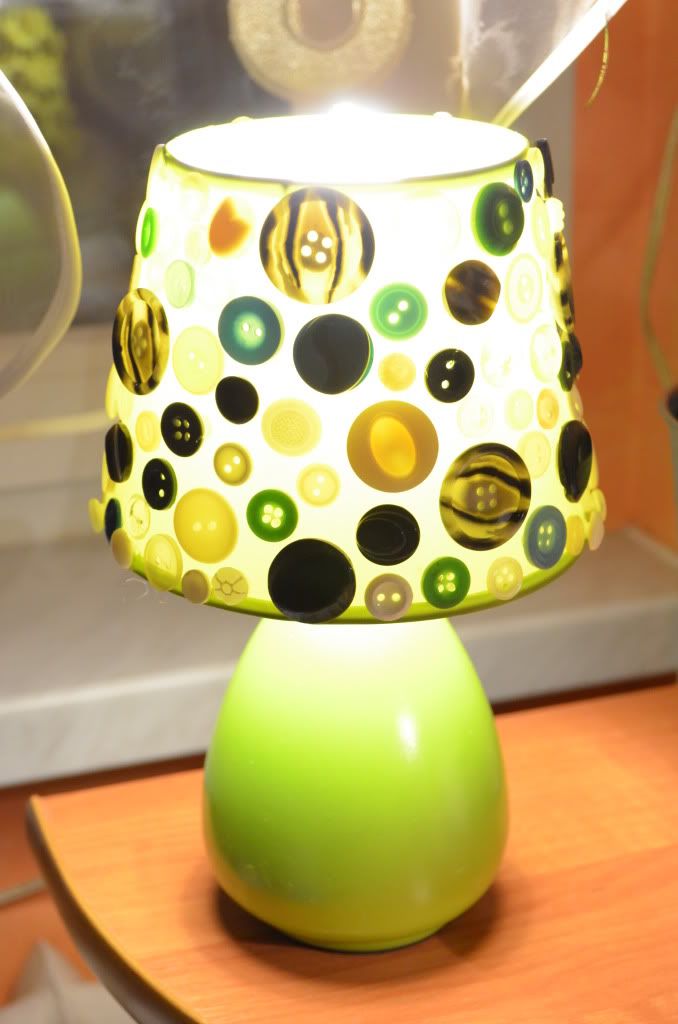
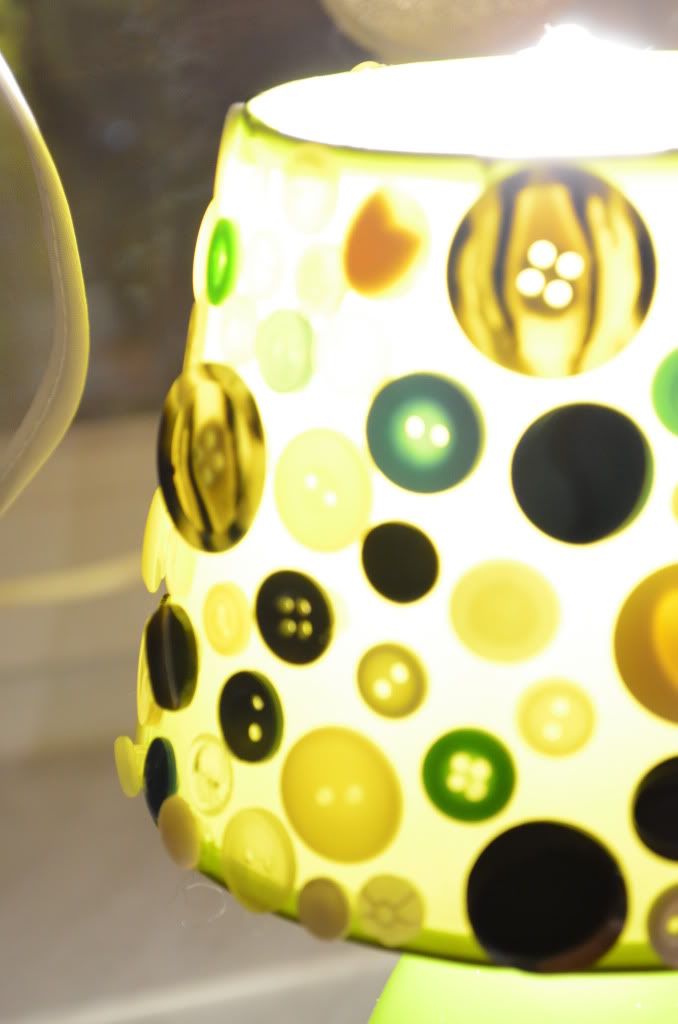
Guzikowy Abażur/ Button Lampshade DIY
Łatwy sposób na przekształcenie abażuru w coś ciekawego i zabawnego! Użyj różnych kolorowych guzików, aby stworzyć wyjątkowy element wystroju Twojego domu. Możesz korzystać z tylu kolorów, kształtów i rozmiarów, ilu tylko chcesz. Użyj wyobraźni i zmień zwykły abażur w coś zupełnie innego.
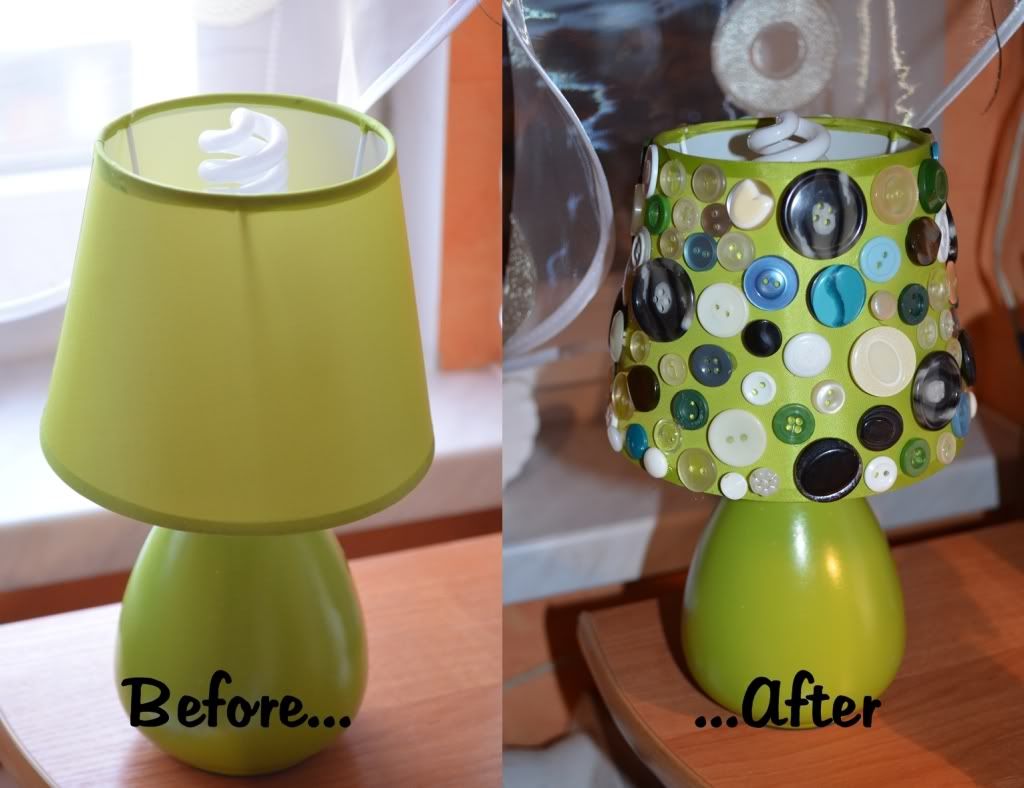
An easy way of making your lampshade more interesting and fun! Use different colurful buttons to create a unique home item. You can use as many colours, sizes and designs as you want. Use your imagination and turn your regular lampshade into something different.
An easy way of making your lampshade more interesting and fun! Use different colurful buttons to create a unique home item. You can use as many colours, sizes and designs as you want. Use your imagination and turn your regular lampshade into something different.
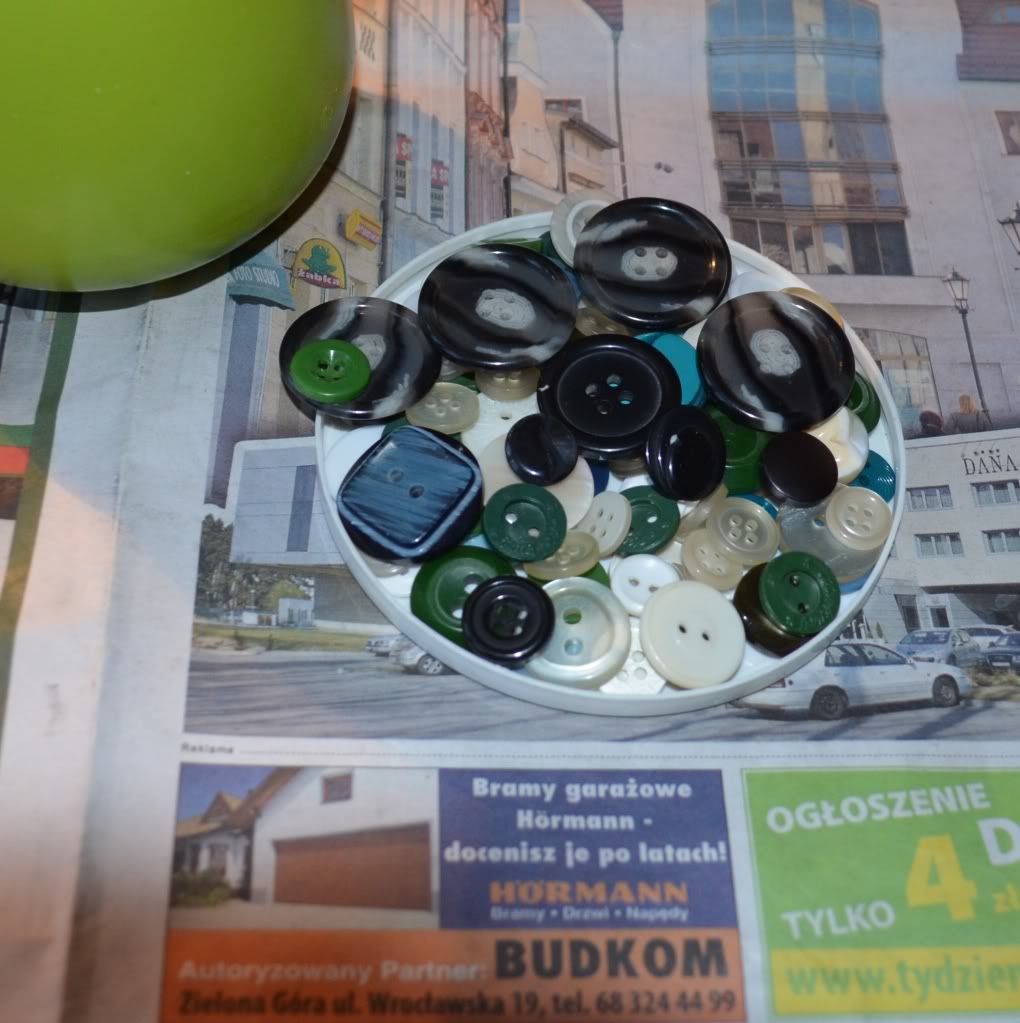
Będą potrzebne: pistolet na gorący klej, klej, guziki, abażur.
1.Uszykuj różne guziki, biorąc pod uwagę wystrój Twojego pokoju i projekt jaki chcesz wykonać. Użyj różnych kolorów, wielkości i kształtów, aby nadać tekstury swojemu abażurowi.
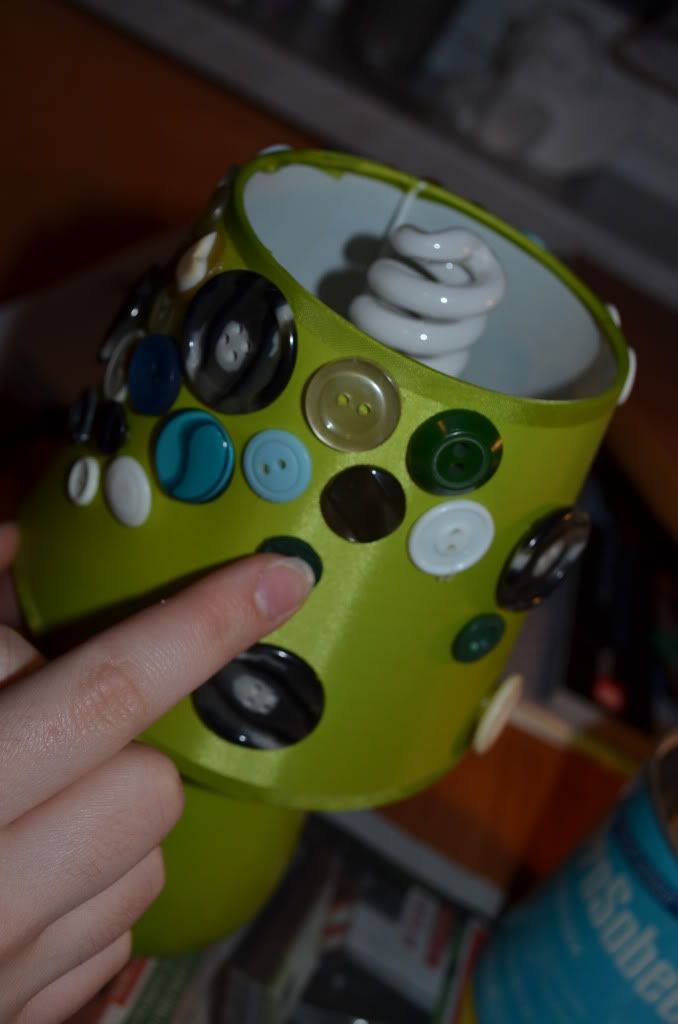
2. Rozgrzej pistolet i włóż laskę kleju. Nałóż małą ilość kleju na tył guzika i przyklej do zewnętrznej strony abażuru.
3. Przyklejaj guziki różnej wielkości i zachowaj odległość między nimi, chyba że Twój projekt uwzględnia inny pomysł.You will need: hot glue gun, glue, buttons, a lampshade.
1. Collect and gather all kinds of buttons keeping your room design and color scheme in mind while you search for them. Get all different sizes and shapes to add more texture to the lampshade design.
2. Preheat the glue gun and load in the glue stick. Then put a small glob of hot glue on the bag of a button and stick it on the outer surface of the lampshade.
3. Make sure you spread different sized-buttons all over the lampshade to create variation unless you have other desing in mind.Tuesday 17 April 2012
Staromodne ciasto czekoladowe/Old-fashioned chocolate cake
Wiem, wiem, to ciasto już tu widzieliście kiedyś, ale nie dodałam wtedy przepisu. Postanowiłam naprawić swój błąd i przy okazji wypróbować ciasto jeszcze raz, tylko teraz ze zmniejszoną ilością cukru :)
I know that some of you have already seen this cake on my blog, but I hadn't posted a recipe then. I decided to make it up to you and by the way, try this recipe out once again. Only this time with less sugar :)
Przepis pochodzi ze strony Nigelli Lawson./ This recipe comes from Nigella Lawson's website.

Składniki:
na ciasto:
- 200g mąki pszennej
- 200g cukru
- 1 łyżeczka proszku do pieczenia
- 1/2 łyżeczki sody oczyszczonej
- 40g kakao gorzkiego, dobrej jakości
- 175g miękkiego niesolonego masła
- 2 duże jajka
- 2 łyżeczki ekstraktu z wanilii
- 150ml śmietany 12%
na krem:
- 75g niesolonego masła
- 175g gorzkiej czekolady dobrej jakości, połamanej na kawałki
- 300g cukru pudru (ja użyłam 200 g)
- 1 łyżka Złocistego Syropy lub miodu
- 125ml kwaśnej śmietany (lub śmietany zwykłej z dodatkiem octu lub soku z cytryny)
- 1 łyżeczka ekstraktu z wanilii
- cukrowe ozdoby (opcjonalnie)
Wyciągnij składniki z lodówki wcześniej, aby były w temperaturze pokojowej.
Rozgrzej piekarnik do 180°C i wysmaruj masłem dwie 20 cm tortownice (najlepiej z wyciąganym dnem).
Teraz, połącz mąkę, cukier i środki spulchniające w dużej misce i wmieszaj masło, tworząc kremową masę. Wymieszaj kakao, kwaśną śmietanę, ekstrakt waniliowy i jajka, i dodaj do miski ze suchymi składnikami. Podziel masę na 2 części i każdą z nich przełóż do tortownicy. Piecz w 180 stopniach C przez 35 min. Ciasto można sprawdzić już po 25 min, aby się nie przypiekło. Oczywiście będzie gotowe, jeśli wsadzony do niego drewniany patyczek wyjdzie suchy.
Gdy ciasto już jest upieczone, wyciągnij je z piekarnika i pozostaw w tortownicy na 10 min. Po tym czasie można spokojnie usunąć tortownice.
*Nie martwcie się pęknięciami na cieście, ponieważ będziemy je zakrywać kremem ;)
Aby przygotować krem należy rozpuścić masło i czekoladę w żaroodpornej misce w mikrofali lub nad garnkiem z gotującą się wodą. gdy czekolada i masło się ochładzają, przesiej cukier puder do miski, aby uniknąć grudek.
Do czekoladowej masy dodaj kwaśną śmietanę i ekstrakt waniliowy i dobrze wymieszaj. teraz dodawaj po trochu cukru pudru. Konsystencja kremu zależy od Ciebie- można dodać trochę przegotowanej wody, jeśli krem jest zbyt gęsty lub też dosypać cukru pudru, jeśli jest zbyt rzadki. najważniejsze, aby krem dał się łatwo rozprowadzić po cieście, ale nie był też zbyt rzadki, ponieważ będzie ściekał.
Ułóż ciasto na talerzu lub innym naczyniu i uszykuj 4 paski papieru do pieczenia. Rozłóż je po bokach talerza, aby nachodziły na siebie i połóż na nich 1 część ciasta.
Na ciasto nałóż 1/3 kremu i rozsmaruj równo. Przykryj kolejnym ciastem i również pokryj 1/3 kremu. Pozostałym kremem pokryj boki.
Wierzch ciasta może być gładki, ale też można zrobić na nim "zawijasy" nożem. W sumie ja tak nawet wolę ;) Teraz wyciągamy delikatnie kawałki papieru do pieczenia-dzięki temu zabiegowi nie brudzimy brzegów naczynia- genialne w swojej prostocie :P
Ciasto można przyozdobić kwiatami cukrowymi, posypkami, etc. lub zostawić go takim, jaki jest.


Ingredients:
for the cake:
- 200g plain flour
- 200g caster sugar
- 1 teaspoon baking powder
- 1/2 teaspoon bicarbonate of soda
- 40g best-quality cocoa
- 175g soft unsalted butter
- 2 large eggs
- 2 teaspoons real vanilla extract
- 150ml sour cream (or regular 10%-12% cream with a bit of lemon juice or vinegar)
for the icing:
- 75g unsalted butter
- 175g best quality dark chocolate, broken into small pieces
- 300g icing sugar (I used 200 g)
- 1 tablespoon golden syrup
- 125ml cream (12% fat)
- 1 teaspoon real vanilla extract
- Sugar flowers, optional
Take everything out of the fridge so that all the ingredients can come to room temperature.
Preheat the oven to 350° F/180°C and line and butter two 20cm sandwich tins with removable bases.
Now all you have to do is put all the cake ingredients - flour, sugar, baking powder and bicarb, cocoa, butter, eggs, vanilla and sour cream - into a food processor and process until you have a smooth, thick batter. If you want to go the long way around, just mix the flour, sugar and leavening agents in a large bowl and beat in the soft butter until you have a combined and creamy mixture. Now whisk together the cocoa, sour cream, vanilla and eggs and beat this into your bowl of mixture.
Divide this batter, using a rubber spatula to help you scrape and spread, into the prepared tins and bake until a cake tester, or a thin skewer, comes out clean, which should be about 35 minutes, but it is wise to start checking at 25. Also, it might make sense to switch the two cakes around in the oven halfway through cooking time.
Remove the cakes, in their tins, to a wire rack and let cool for 10 minutes before turning out of their tins. Don't worry about any cracks as they will easily be covered by the icing later.
To make this icing, melt the butter and chocolate in a good-sized bowl either in the microwave or suspended over a pan of simmering water. Go slowly either way: you don't want any burning or seizing.
While the chocolate and butter are cooling a little, sieve the icing sugar into another bowl.
Add the golden syrup to the cooled chocolate mixture, followed by the sour cream and vanilla and then when all this is combined whisk in the sieved icing sugar.
When you've done, you may need to add a little boiling water - say a teaspoon or so - or indeed some more icing sugar: it depends on whether you need the icing to be runnier or thicker; or indeed it may be right as it is. It should be liquid enough to coat easily, but thick enough not to drip off.
Choose your cake stand or plate and cut out four strips of baking parchment to form a square outline on it (this stops the icing running on to the plate). Then sit one of the cakes, uppermost (ie slightly domed) side down.
Spoon about a third of the icing on to the centre of the cake half and spread with a knife or spatula until you cover the top of it evenly. Sit the other cake on top, normal way up, pressing gently to sandwich the two together.
Spoon another third of the icing on to the top of the cake and spread it in a swirly, textured way (though you can go for a smooth finish if you prefer). Spread the sides of the cake with the remaining icing and leave a few minutes till set, then carefully pull away the paper strips.

xoxo,
Aga
Monday 16 April 2012
Sunday 15 April 2012
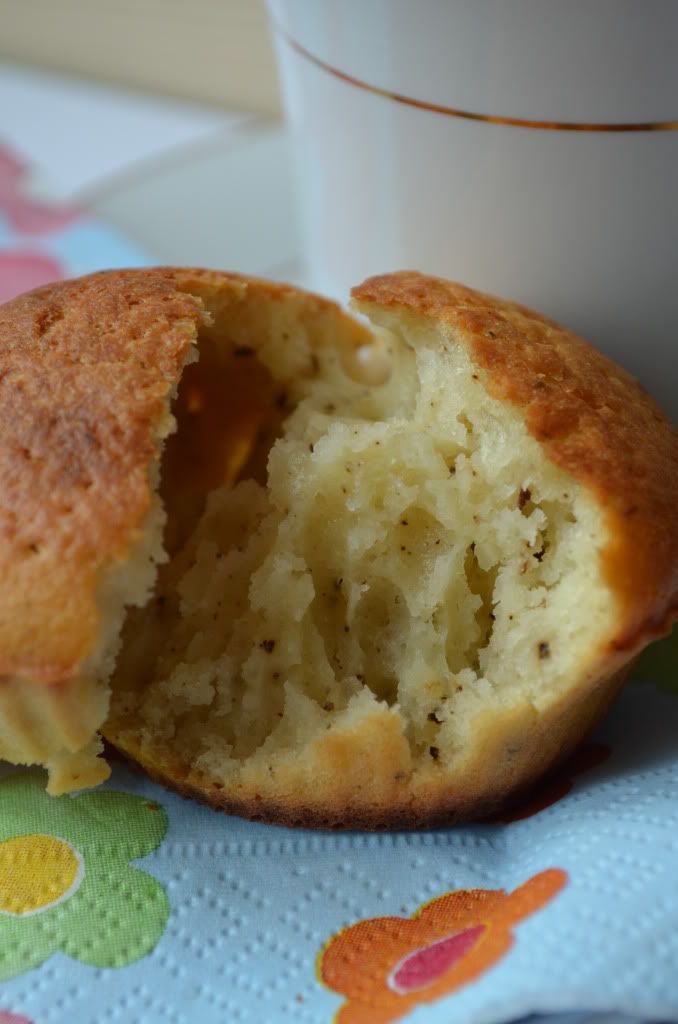
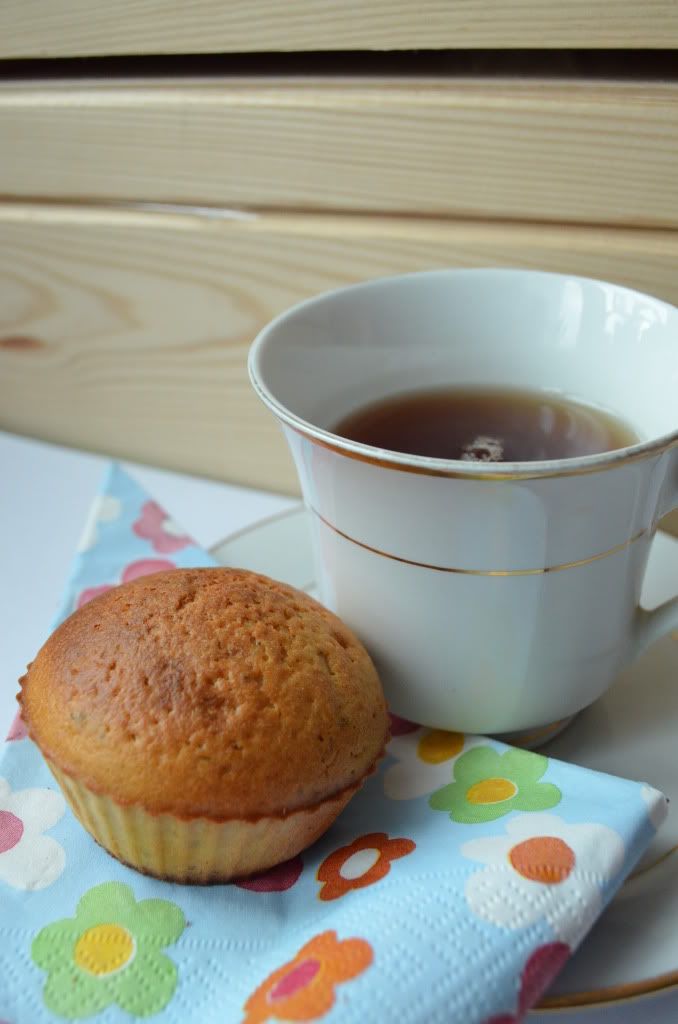
Muffiny z herbatą Earl Grey/ Earl Grey Tea Muffins
Nie wiem jak Wy, ale ja uwielbiam herbatę. Różne rodzaje. Nawet wczoraj udałam się do sklepu z herbatami i kupiłam herbatę Orientalną i moją ulubioną Marcepanową Różę. Pyszności!
Muszę przyznać, że przepisem na muffiny z herbatą spotkałam się dawno temu (z zieloną herbatą japońską matcha), ale jakoś tak nigdy za niego się na poważnie nie zabrałam. Dzisiaj pomyślałam, że warto to zmienić, ale w domu zielonej herbaty brak. Ale za to mam mój ukochany Earl Grey. Tak, już wiecie. Wykorzystałam go. I jest super. Naprawdę bardzo polecam. A już Earl Grey'owy muffin z herbatą Earl Grey to istne niebo ;)

I don't know how about you, but I L-O-V-E tea. Different kinds. Even yesterday, I went to the tea shop and I bought Oriental tea and my Favourite Marzipan Rose. Delicious!
I must admit that I found the tea muffins recipe (with green japanese matcha tea) a long time ago, but I just couldn't get myself to doing that. Today, I thought that it's worth changing, but unfortunately, I have no green tea at home. But luckily, I have my all time favourite Earl Grey. And yes, you know already. I used it. And it's great. Really great. I totally recommend it. The combination of Earl Grey tea and Earl Grey tea muffins is just awesome.
Przepis (zaczerpnięty i zmieniony) pochodzi ze tej strony./ The recipe (taken and edited) comes from this site.
Składniki:
- 2 szklanki mąki minus 3 łyżki (230g)
- 1 1/2 łyżeczki proszku do pieczenia
- 4 łyżki cukru (Sucanat lub jasnego brązowego cukru lub cukru trzcinowego lub zwykłego białego cukru)
- szczypta soli
- 2 duże jajka
- 3 łyżki oleju roślinnego (bezsmakowego)
- 1 1/3 szklanki maślanki (lub 1 1/3szklanki zwykłego mleka o niskiej zawartości tłuszczu + 1 łyżka octu)
Ponadto:
- 1 łyżeczka lub 1 torebka herbaty Earl Grey- pokruszone liście herbaty
Rozgrzać piekarnik do 180 stopni C. Jeśli trzeba, posmarować foremki na muffiny tłuszczem.
Połączyć suche składniki. W drugiej misce połączyć dobrze mokre składniki. Wsypać suche składniki do mokrych i połączyć je razem za pomocą łyżki/szpatuli. Nie mieszać zbyt długo, tylko do połączenia składników. Dodać pokruszone liście herbaty i zamieszać. Rozłożyć ciasto do foremek, po równo. Piec przez 20 min (mini muffiny) lub 25-30 min (zwykły rozmiar muffinek) lub do momentu, gdy drewniany patyczek włożony w muffina po wyciągnięciu będzie czysty.
Ingredients:
- 2 cups minus 3 Tablespoons (230g) flour
- 1 1/2 teaspoons baking powder
- 4 Tablespoons sugar (Sucanat sugar or light brown sugar or raw cane sugar or regular sugar)
- Pinch of salt
- 2 large eggs
- 3 Tablespoons canola oil or light olive oil (or other flavorless vegetable oil)
- 1 1/3 cups buttermilk (or 1 1/3 regular low-fat milk + 1 Tablespoon vinegar)
Plus:
- 1 tablespoon or 1 teabag fine Earl Grey tea leaves (crumbled between fingers)
Preheat the oven to 180°C / 360°F. Grease or spray non-stick spray onto your muffin tins if needed.
Mix or sift together the dry ingredients. Beat together the wet ingredients until blended. Fold the dry ingredients into the wet ingredients, using a spatula. Don’t overmix. Add the tea leaves. Spoon the batter into the muffin tins evenly. Bake for about 20 minutes for mini-muffins, 25-30 for regular size muffins, until the tops are browned and a skewer stuck through a middle muffin comes out clean.
xoxo,
Agnieszka
Saturday 14 April 2012
Friday 13 April 2012
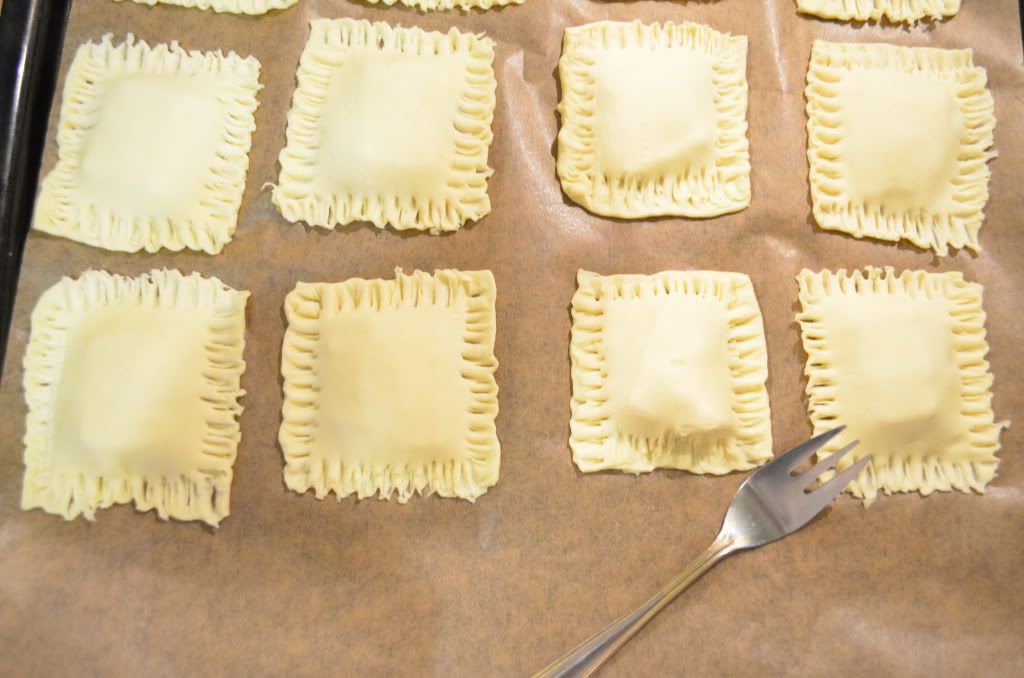
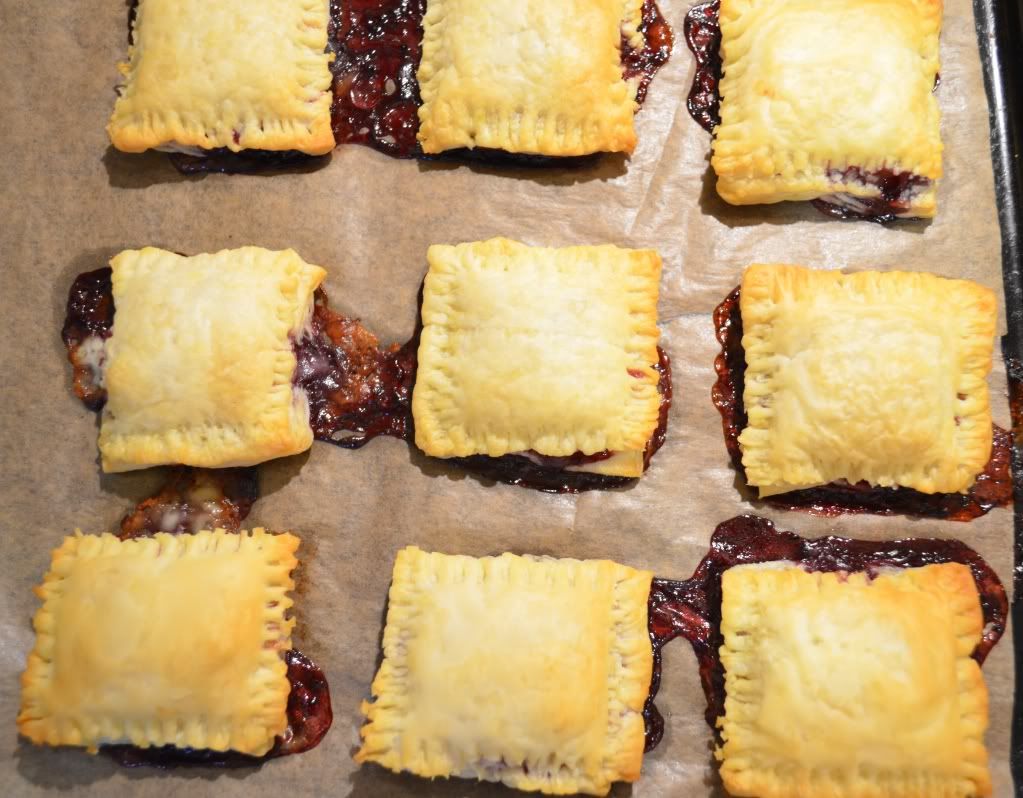
Pieczone kieszonki z serem brie na jeden kęs /Bite-sized baked brie pockets
Bardzo lubię połączenie sera pleśniowego z dżemem, ale i też wiadomo, że gotowe ciasto francuskie nie może nie wyjść. Z połączenia tych dwóch założeń wyszło to, czyli pieczone kieszonki z serem brie na jeden kęs. Szybka słodka przekąska o ciekawym smaku. Jacyś chętni? ;)
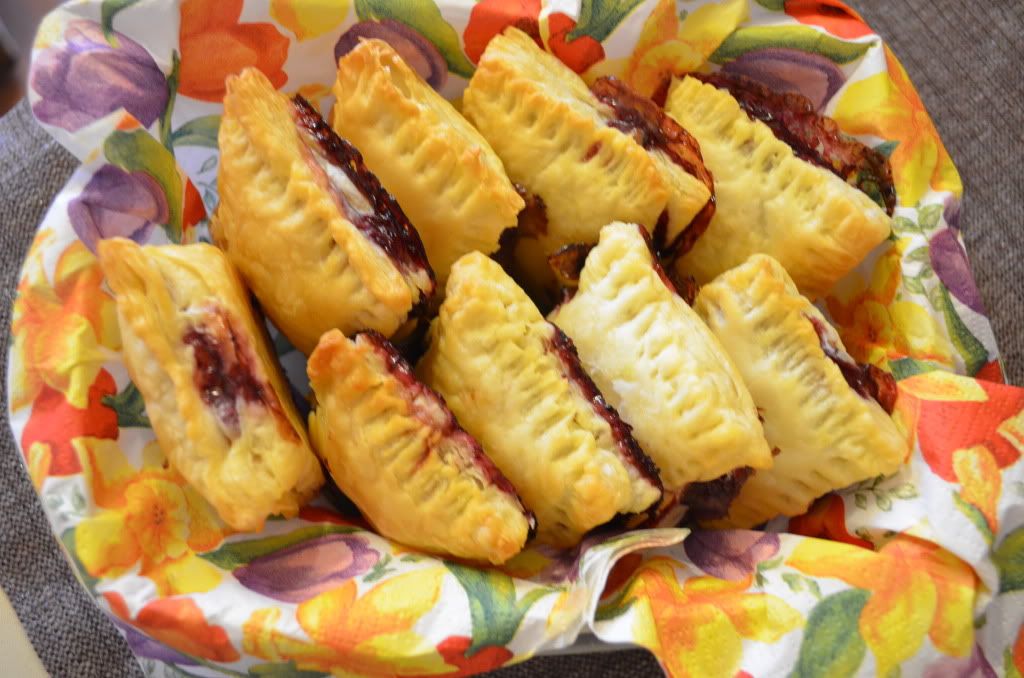
I really like the mix of brie cheese and jam, and of course, you know that bought puff pastry just can't turn out wrong. When we combine these two statements together, we have bite-sized baked brie pockets. Fast and sweet snack with an interesting flavour. Any volunteers? ;)

Składniki:
I really like the mix of brie cheese and jam, and of course, you know that bought puff pastry just can't turn out wrong. When we combine these two statements together, we have bite-sized baked brie pockets. Fast and sweet snack with an interesting flavour. Any volunteers? ;)
Składniki:
- 1 opakowanie zimnego ciasta francuskiego
- 1/2 sera pleśniowego brie
- 1/3 szklanki dżemu z czarnej porzeczki (lub jakiegokolwiek, który lubicie!)
Pokroić ciasto francuskie na 24 prostokąty równej wielkości, które po złożeniu utworzą 12 prostokątnych kieszonek. Na ciasto połóż mały plasterek sera brie. Następnie, nałóż na to pół łyżeczki dżemu. Wziąć prostokąt ciasta i lekko go rozciągnąć w palcach i położyć na reszcie kieszonki. Brzegi połączyć za pomocą widelca. Piekarnik rozgrzać do 190 stopni c. Kieszonki wyłożyć na papierze do pieczenia i piec przez 12-14 minut aż będą złocisto-brązowe. Potem wyciągnąć je z piecyka, wystudzić i są gotowe do jedzenia.
Smacznego! :)
Ingredients:Smacznego! :)
- 1 sheets puff pastry, thawed but still cold
- 1/2 wedge of brie, cold
- 1/3 cup blackcurrant jam (or any flavor you fancy!)
Cut a sheet of puff pastry into 24 little rectangles that will create 12 little rectangle pockets. Place a small sliver of brie. Top with about 1/2 teaspoon of cherry jam. Take another square of puff pastry and press between your fingers to make the rectangle slightly bigger. Place puff pastry on top of the cheese and jam. Use a fork to press the edges together. Make sure to seal the edges well by crimping with the fork. Place a rack in the center of the oven and preheat oven to 375 degrees F. Place prepared brie bites on a parchment paper. Bake for 12 to 14 minutes or until golden brown. Remove from the oven and allow to cool slightly before serving.
 xoxo,
xoxo,
Agnieszka
Agnieszka
Wednesday 11 April 2012
Marchewkowe muffiny nadziewane serkiem/ Cream-Filled Carrot Muffins
Ciekawa propozycja dla smakoszy marchewki (tak, mówię o sobie :P ). Dodatek przypraw korzennych i serka to coś, co dodatkowo hmmm skłoniło mnie do tego przepisu. A Wy dacie się namówić? ;)
An interesting recipe for carrot fans ( yes, I'm talking about myself :P ). An addition of spices and cream- things that ,let's say frankly, made me try this treat. Have I convinced you? ;)

Składniki:
Nadzienie:
- 1 opakowanie cream cheese (ja użyłam ricottę)
- 1/4 szklanki cukru
- 1/2 łyżeczki ekstaraktu z wanilii
- szczypta soli
Ciasto:
- 2 1/4 szklanki mąki pszennej
- 1/2 szklanki cukru
- 1/4 szklanki brązowego cukru
- 1 1/2 łyżeczki proszku do pieczenia
- 1/4 łyżeczki sody oczyszczonej
- 1 1/2 łyżeczki mielonego cynamonu
- 1/2łyżeczki mielonego imbiru
- 1/4 łyżeczki mielonej gałki muszkatołowej
- 3/4 łyżeczki soli
- 2 duże jajka
- 3/4 szklanki wody
- 1/3 szklanki oleju roślinnego
- 1 szklanka startej marchewki, należny ją ubić w szklance( ok. 3 mniejszych marchewek)
- 1/4 szklanki wiórek kokosowych (opcjonalnie)
Nadzienie- Podgrzej serek w mikrofali ok 40 sekund na najmniejszym ustawieniu temperatury.Wmieszaj sól, cukier i ekstrakt waniliowy; odłóż na bok.
Ciasto- W misce wymieszać suche składniki. W drugiej misce połączyć razem mokre składniki. Zmiksuj zawartość dwóch misek razem do momentu połączenia składników. Na końcu dodaj wiórki kokosowe i startą marchewkę i dokładnie połącz z ciastem za pomocą łyżki lub gumowej szpatuli.
Do 12 foremek na muffiny (o zwykłym rozmiarze) nałóż 2 łyżki ciasta na spód i wygładź. Nałóż łyżkę serka. Teraz zakryj muffiny pozostałą częścią ciasta.
Piecz muffiny w 200 stopniach C przez ok. 18-20 min lub do momentu aż drewniany patyczek włożony w muffina wyjdzie suchy. Wyciągnij muffiny z piecyka i wystudź je.


Ingredients:
For the filling:
- 1 (8-ounce package) cream cheese ( I used ricotta cheese)
- 1/4 cup granulated sugar
- 1/2 teaspoon vanilla extract
- A pinch of salt (optional)
For the batter:
- 2 1/4 cups all-purpose flour
- 1/2 cup granulated sugar
- 1/4 cup dark brown sugar, firmly packed
- 1 1/2 teaspoons baking powder
- 1/4 teaspoon baking soda
- 1 1/2 teaspoons ground cinnamon
- 1/2 teaspoon ground ginger
- 1/4 teaspoon ground nutmeg
- 3/4 teaspoon salt
- 2 large eggs
- 3/4 cup water
- 1/3 cup vegetable oil
- 1 cup grated carrots, lightly packed (about 3 small carrots)
- 1/4 cup flaked coconut (optional)
Filling- In a microwave-safe bowl, heat the cream cheese on low power for 30-40 seconds. Stir in the sugar, vanilla and salt; set aside.
Batter- In the bowl of a stand mixer fitted with a whisk attachment, blend together the dry ingredients. In a separate small bowl, whisk together the eggs, water, and oil. Switch out the whisk attachment on your mixer with the paddle attachment, and, using a low speed, blend the the wet ingredients into the dry ingredients, mixing just until blended. Using a rubber spatula, fold in by hand the grated carrots (and coconut, if using), making sure they are evenly incorporated throughout the batter.
Drop about 2 tablespoons of the batter into 12 muffin cups ( regylar size) spreading it to cover the bottom. Dollop a heaping tablespoon of filling on top of the batter. Now, use the remaining batter to fill the muffin cups quite full, using a spoon to evenly spread the top layer of batter so it completely covers the filling center.
Bake the muffins in a 400-degree oven until a toothpick inserted into the cake part of one comes out clean, about 18-20 minutes. The tops of the muffins will feel firm to the touch. Remove the muffins from the oven and transfer them to a rack. Wait to serve the muffins until they have cooled for a half hour or so.

xoxo,
Agnieszka
Tuesday 10 April 2012
Jaskółkowa broszka/ A swallow brooch
Jak wiecie jestem fanką jaskółek, dlatego nie wyobrażam sobie mojej kolekcji biżuterii bez tej broszki, i oczywiście kolczyków do kompletu. No tak, kolejnych kolczyków ;) Mój zbiór ciągle rośnie!
As you may know, I'm a big fan of swallows and therefore, I can't imagine my jewellery collection without this precious item- my brooch, and of course earrings. And yes, another swallow earrings ;) My collecion is still growing!


xoxo,
Agnieszka
P.S. Dzięki Kaja za pomoc w rozwiązaniu mojego 'blogowego' problemu! :)
As you may know, I'm a big fan of swallows and therefore, I can't imagine my jewellery collection without this precious item- my brooch, and of course earrings. And yes, another swallow earrings ;) My collecion is still growing!


Bluzka/Blouse- Camaieu
Pasek/Belt- Camaieu
Spódnica/Skirt- Vintage- sh
Rajstopy/Tights- ?
Buty/Shoes- Deichmann
Broszka/Brooch- Glitter
Kolczyki/Earrings- Glitterxoxo,
Agnieszka
P.S. Dzięki Kaja za pomoc w rozwiązaniu mojego 'blogowego' problemu! :)
Monday 9 April 2012
Zielony, granatowy, czarny i jaskółka/ Green, navy blue, black and a swallow
Szybki post z wczorajszym strojem i wracam dalej świętować do rodziny ;)
A quick post with yesterday outfit and I'm back to my family to go on celebrating ;)


xoxo,
Agnieszka
A quick post with yesterday outfit and I'm back to my family to go on celebrating ;)


Bluzka/Blouse- Camaieu
Sukienka/Dress- Camaieu
Rajstopy/Tights- ?
Buty/Shoes- CCC
Naszyjnik/Necklace- Katherine.com xoxo,
Agnieszka
Subscribe to:
Posts
(
Atom
)